

Putting a Face to the Plush
If you're like me, you enjoy making plushies and soft dolls! Many artists use an embroidery machine to add the all important facial features to their softies. But what if you don't have an embroidery machine?
Here are some alternative ways to craft a beautiful face onto your plushie!
Safety Eyes:

Plush by Dollphinwing
One of the more common methods of creating a face is adding safety eyes. These are plastic or glass beads with a flat side that goes against the fabric. Safety eyes can come in solid colors or different designs. You might use a green cat eye for your kitty plush for example.
They usually have a post on the back which goes through a hole in the fabric, and are secured with a washer. Because of this they are quite difficult to remove once in place, so carefully determine the spot they should go.
You often see black plastic safety eyes used, but there are many different colors and even hand painted eyes available.
Applique:
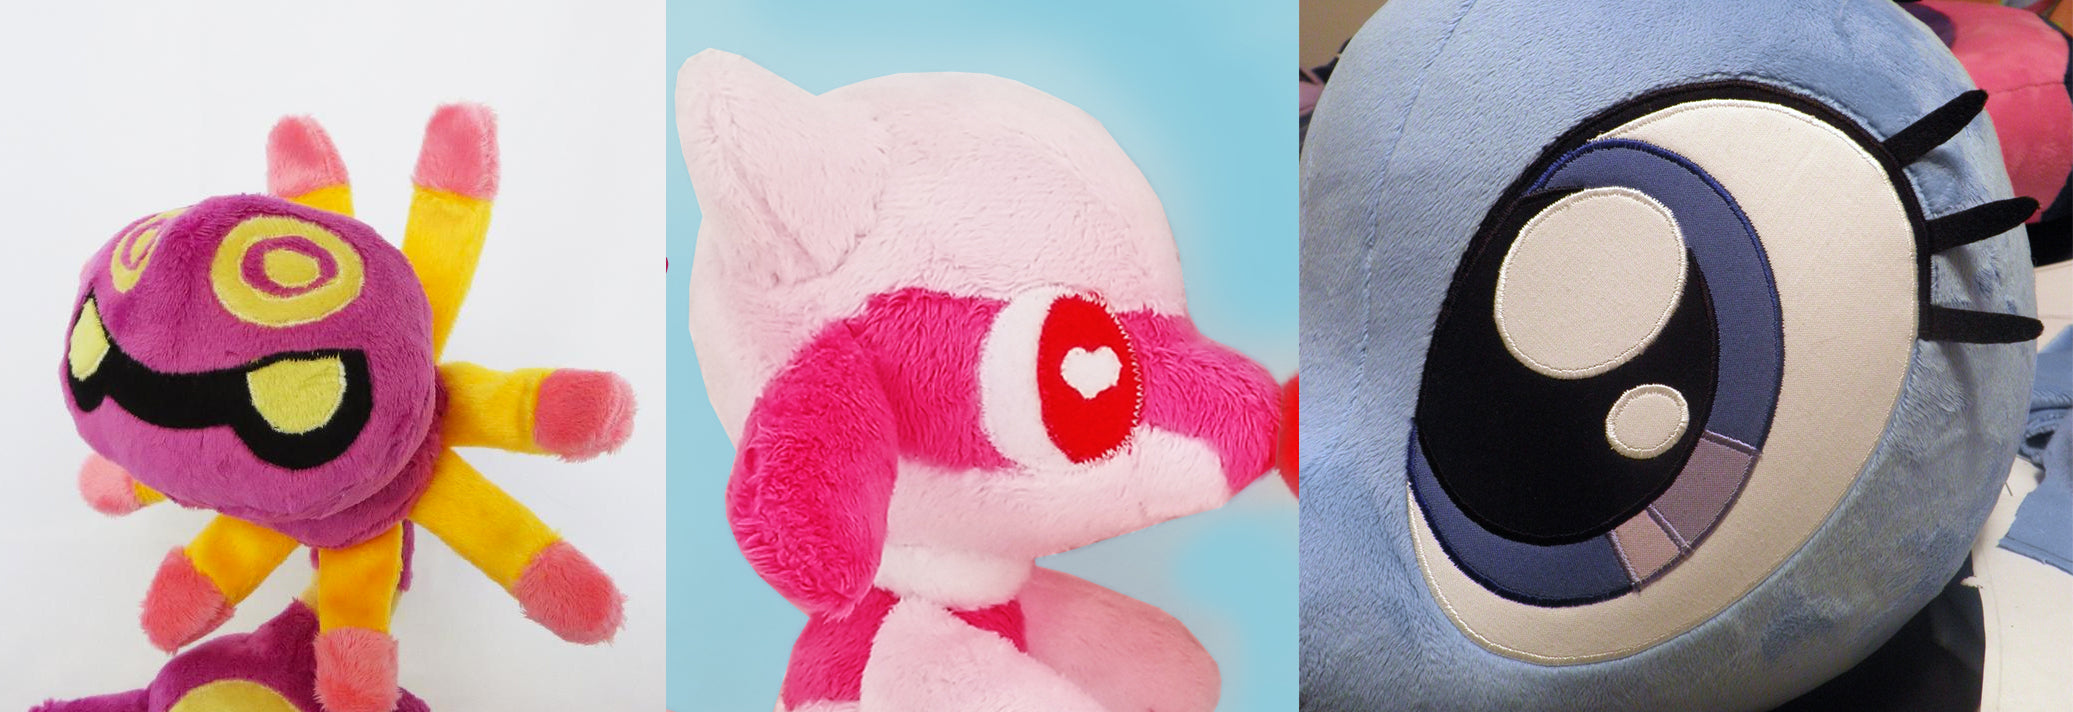
Plushies by Dollphinwing and QTpony
Applique is a very common way of adding details to a plush or doll. It can be done by cutting fabrics into different shapes and sewing them down using a zigzag/satin stitch in order to create a design. This can also be done by hand or by machine, and since you can create a large variety of designs it's a popular way of making eyes and other markings!
Button Eyes:

Plush by Dollphinwing, HoopsandSofties, and Lynn Odea
Another method of attaching eyes is using buttons. Since buttons come in all kinds of sizes, colors and shapes, they can make an excellent and cute addition to a plush! Of course you may not like this idea if your name is Coraline...
Hand Embroidery and Free Motion Embroidery:
 Hand embroidery, by Winks + Wildflower, Grace Beauban, and Buttonjarmonsters

Free motion embroidery, by Dollphinwing and Donna M Evans
Just because you may not own an embroidery machine doesn't mean you can't do embroidery at all! You can always put your fabric in a hoop and then embroider details by hand.
You can also attach an embroidery foot onto a regular sewing machine and embroider a design manually by moving the fabric around to fill in color or outline shapes.
Painting and Drawing:

Plush by Dollphinwing
Fancy yourself a painter? Good for soft dolls made with a smooth material, details can be painted right onto the surface! Fabric markers or permanent pens can also be used to draw lines onto the material to create an expressive face.
Sculpting:

Plushies by A Touch of Pixie Magic, Piquipauparro, and Dollphinwing
Grab some clay and create an animal nose, three dimensional eyes, or even horns and claws! Sculpting details and even entire body parts is a method used for many art dolls and you can do the same! Just be sure to attach a loop or other fixture to help you sew the parts on or otherwise leave the back flat and use super glue!
Iron Transfer Paper or Heat Transfer Vinyl:

Plushies by TeacupLion and Dathron and Threads
This is an easy way to attach eyes to your softie. There's a product called iron-transfer paper, which is a paper that you can print an image onto. Once printed, cut the image out and iron it directly to your fabric. You can also use Heat Transfer Paper or Vinyl either in solid colors or printed. This is a great way to add detailed and colorful eyes or other detailing to your plushies!
Here's a video demonstrating the iron-transfer technique
Printing:

Plush by Dollphinwing
Getting your doll's face or tricky details printed directly to your fabric is also an option. Either by using your printer at home to get designs onto the fabric, or using a custom printing service such as Spoonflower. Your only limit is your imagination!
Here's a video demonstrating the at-home printing method
Thread Sculpting:
You may have noticed how the mouth on some of these plushies have a 3D look. This is achieved by a method called thread sculpting. You anchor your thread on one side of your already stuffed plush, and pull the needle through to the other side. Gently tug on the thread to pull the fabric closer together, making sure not to pull so much you create wrinkles.
This technique can not only create a mouth, but also change the general shape of your plush head. Try making the eyes closer together or making a snout stick out more!
Here's a video tutorial on thread sculpting
Other Methods:

Plushies by Speak Geek and Enter, and CreativeBadg3r
The methods mentioned so far aren't the only ways to create a face on your plush or soft doll. There's also needle felting (Doll on the left) and using heat and bond on felt pieces to create an eye without needing to stitch (plush on right)
Mix and Match:
Of course, all of these methods can be mixed together for even more possibilities! Paint on top of applique, mix buttons and hand embroidery together, even safety eyes on applique with hand embroidered details!

Plush by Dollphinwing, D.iscordia, Raynn's Crafting
What did you think of this list? Any techniques you use that I didn't mention here? Let me know down in the comments!
Looking for more tutorials? Check out my list of best videos for plushmaking techniques!
https://dollphinwing.com/blogs/news/plush-making-video-tutorials